Steam Happens 4 Supplement
Pictures and Movies of the building of Steamboating Magazine's
Putt-Putt Model Boat Prototype
This is a project designed to attract kids
and their parents to our hobby. If you build this Activity Center
you or your steamboating organization can help groups of kids and their parents make and take home their own
Putt-Putt (or Pop-Pop) boat prototype.
The kids are then challenged to redesign their boat at home to make a second generation boat that performs better or differently. The kids bring their new design to a subsequent organization-sponsored activity where they build and operate their new second generation boat publicly without direct parental help. The boats must always be built and operated with direct parental supervision (but not parental takeover). Parents must function as mentors only, with all building done directly by the kid.
These boats are designed for indoor operation using alcohol as fuel. All use must be adult supervised at all times.
The finished prototype boat:
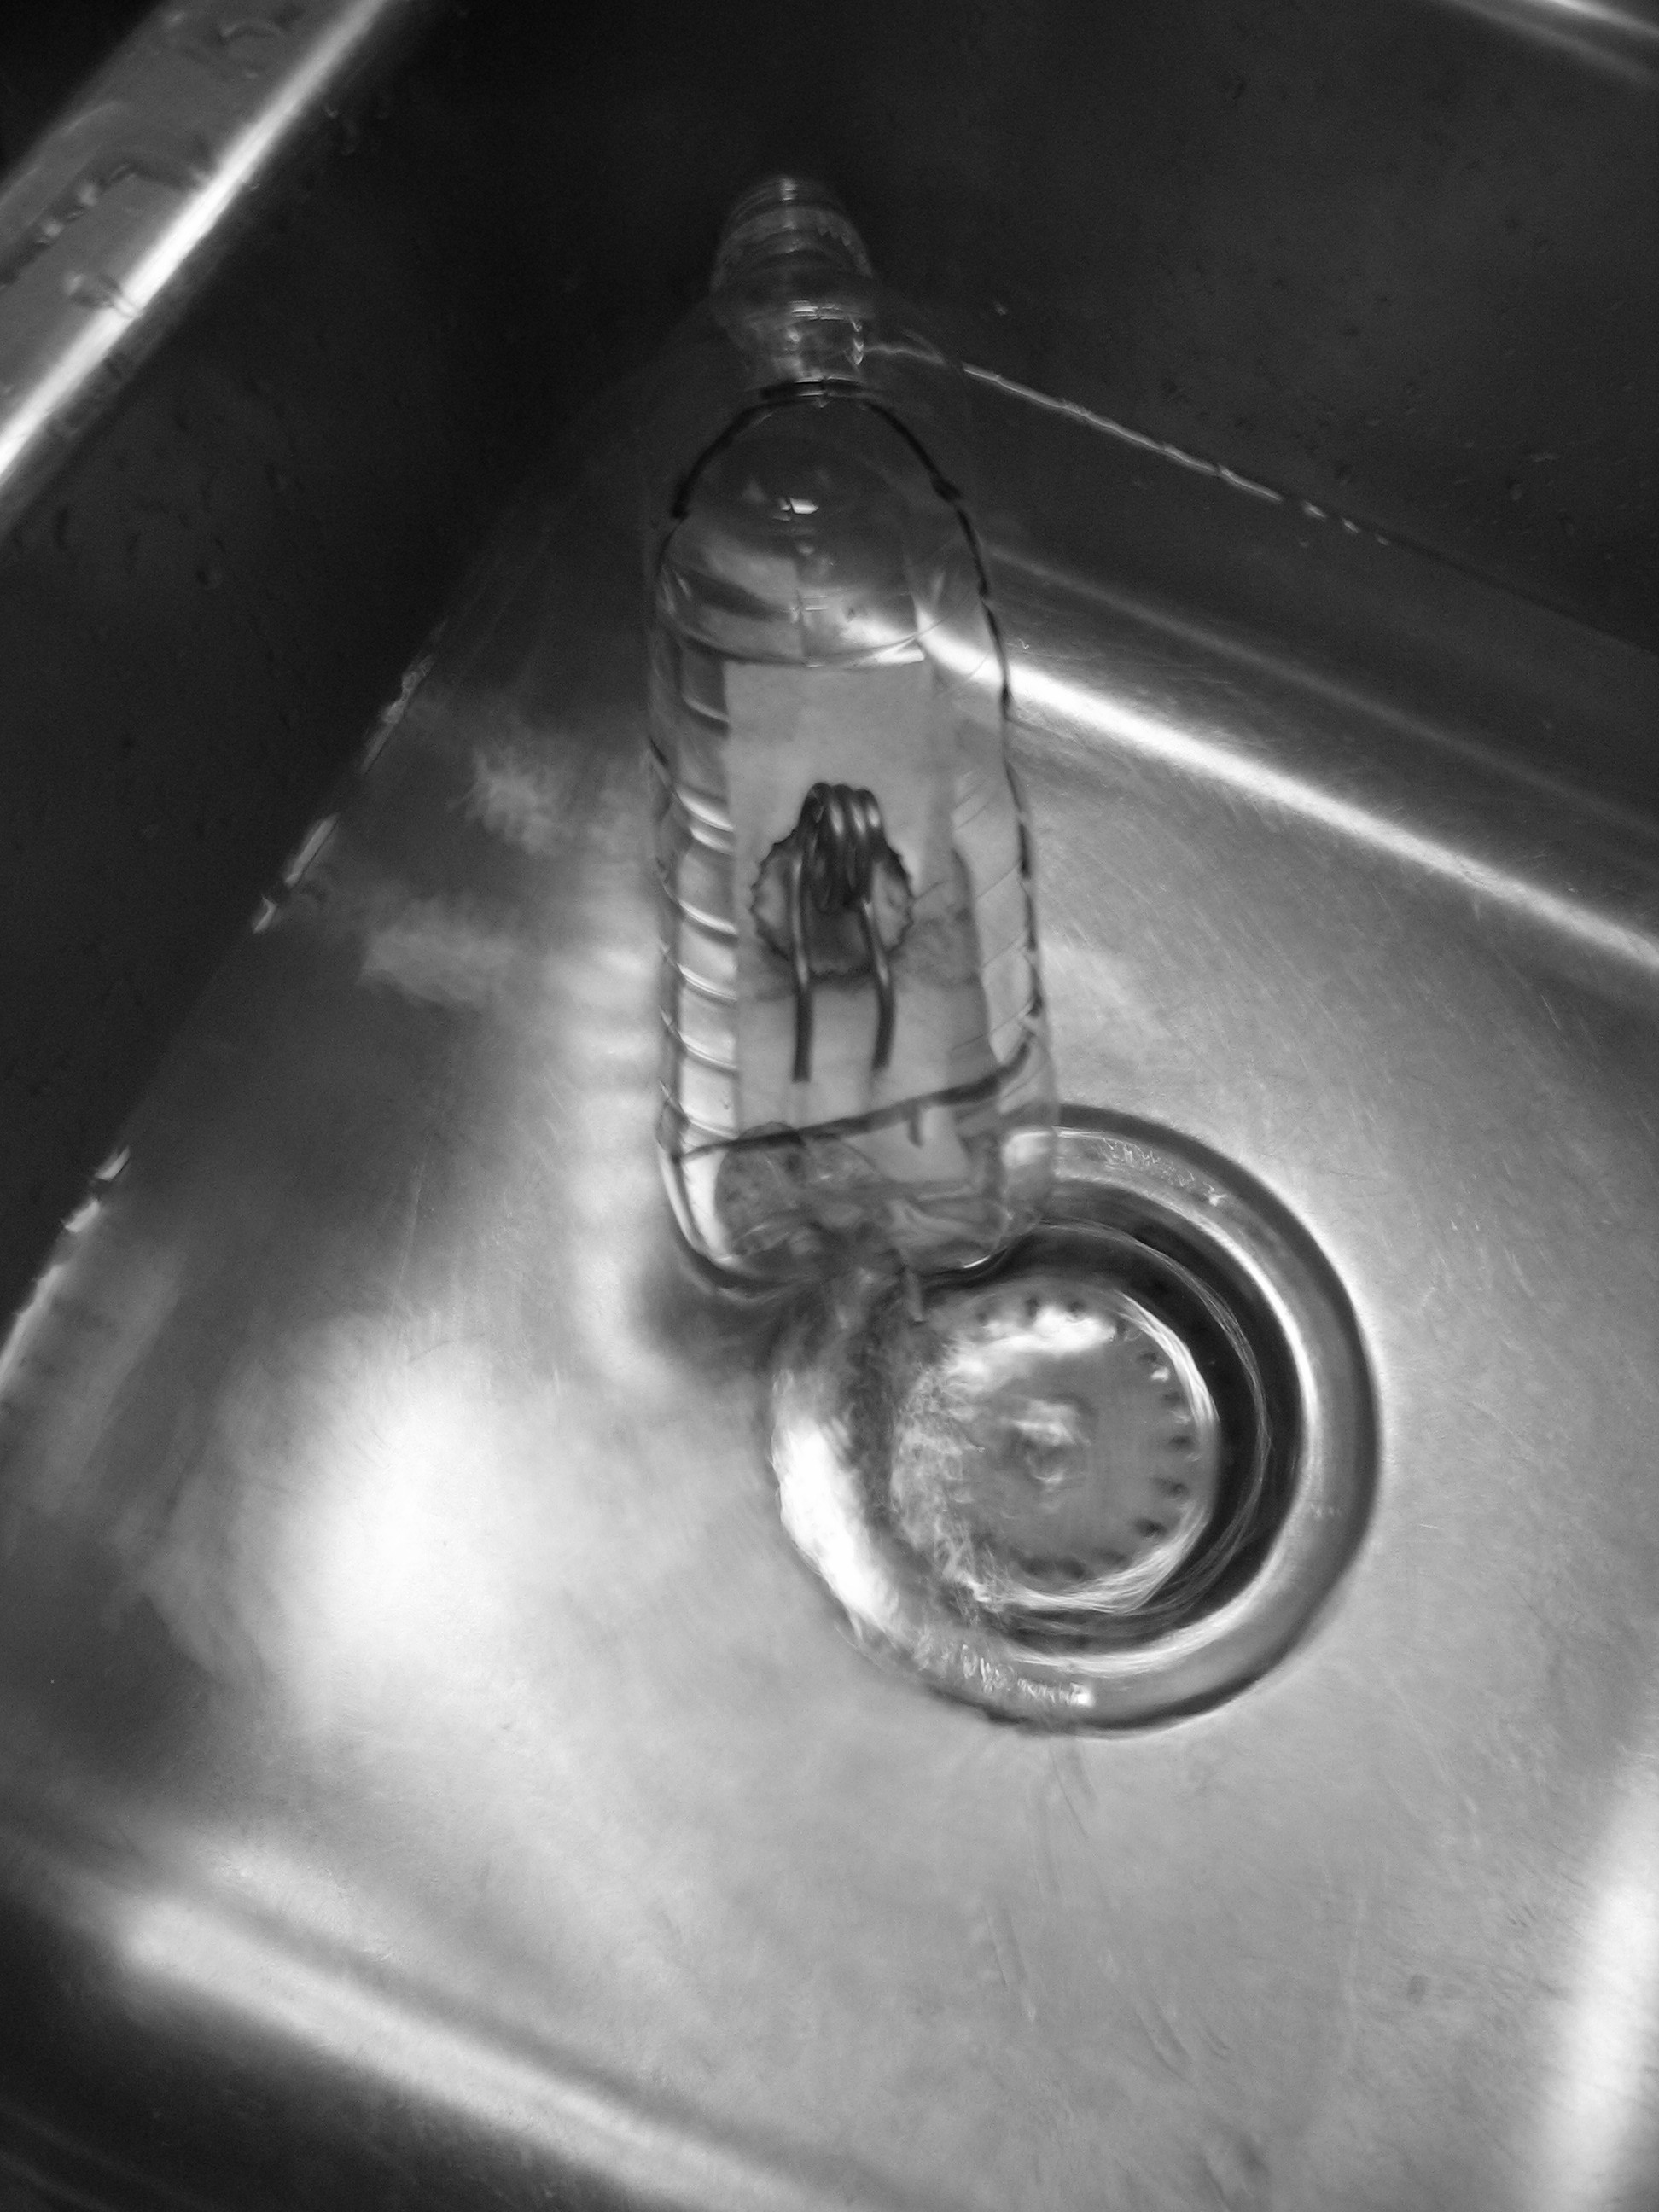
starting the boat putting around the kitchen sink
Click above to download videos of the boat starting and in operation.
(These are very large files.
Download only if you have a broadband connection):
picture 1
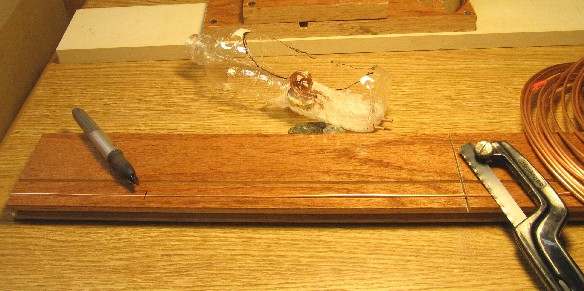
The jigs:
Tubing Cutting Jig:
Note that there are two 1/8 inch deep and 1/8 inch wide grooves running 5/8
inch apart passing
down
the board from end to end.
A cutting slit is sawn across the board 14 inches from
the left side. A
fine toothed hack saw blade
(>40 tpi) can fit into this slit to cut tubing to length.
The felt marker
below points to a
"centering point"
mark placed on the board 4 inches from the left end.
picture 2
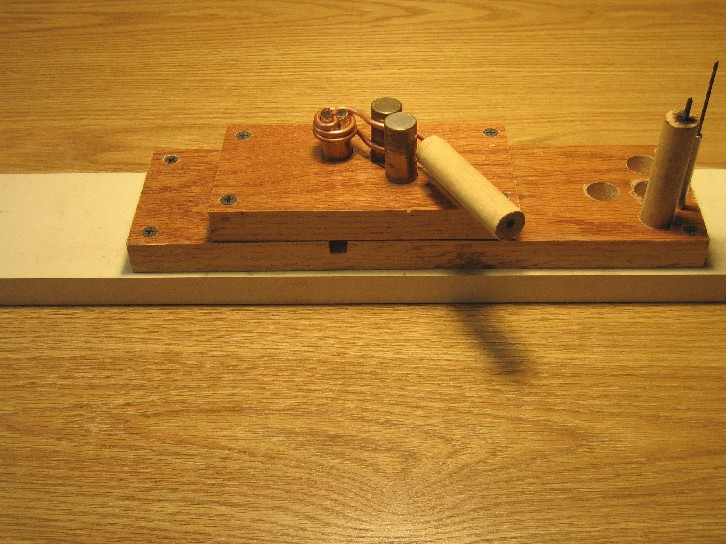
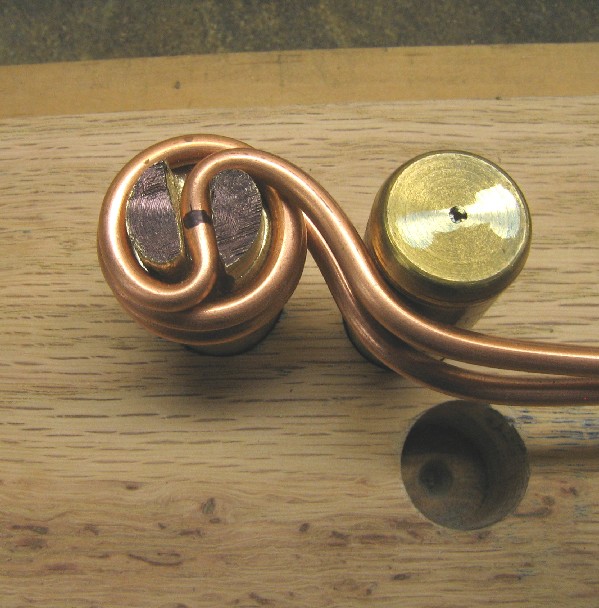
Engine Bending Jig:
Note below that there is a 1/4 inch slot running the width of the jig under the brass bending dowel
( the leftmost dowel with the copper tube spiral).
The base of the bending dowel has been filed to fit into this groove. In this way, the bending dowel
won't turn as the tubing is bent around it. Of course, if your bending dowel is hardwood,
you may simply glue it into the hole.
picture 3
Close-up of end of bending dowel (with bent tubing spiral):
picture 4
All dowels are 5/8 inch diameter. The top dowels are located 1
inch between centers.
The bottom right rod center is 1/4" to the right of the top right rod center and
3/4 inch below it.
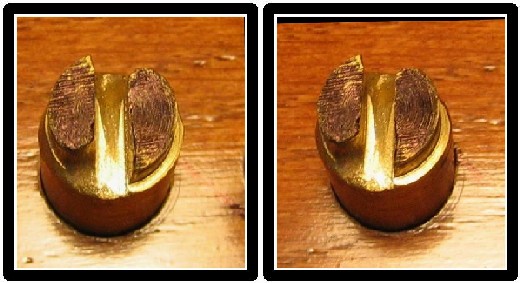
picture 5, a 3d stereo shot of the dowels
It is suggested that you use hardwood dowels for your bending
jig as they are easier to file to the pattern
shown in black on the above left dowel. However, wooden dowels will
eventually wear.
If you are going to use your jig over a long period of time, you may wish to make the bending dowel from brass.
(click here and scroll to the bottom of the opening steamboat page for instructions on how to "free view" a stereo photo)
The boat-building process:
Cut and straighten 14 inches of 1/8 inch copper tube. Sand the ends
lightly, remove burrs, clean bore
with #50 drill
or a fine pointed Xacto blade. Mark
a centering point 4 inches from end.
Place tubing on bending dowel with the centering mark
in the bending dowel's center and the short
leg of the tubing on the far
side. Bend the short leg
clockwise (the right leg shown below)
for about 1/6 rotation till it is tangent to the left side of the nearest empty dowel hole.
Be sure to
keep this tube horizontal as it is bent.
(it's the partially bent right leg in the photo below. The leg needs to be
pushed closer to the dowel using a
wooden block)
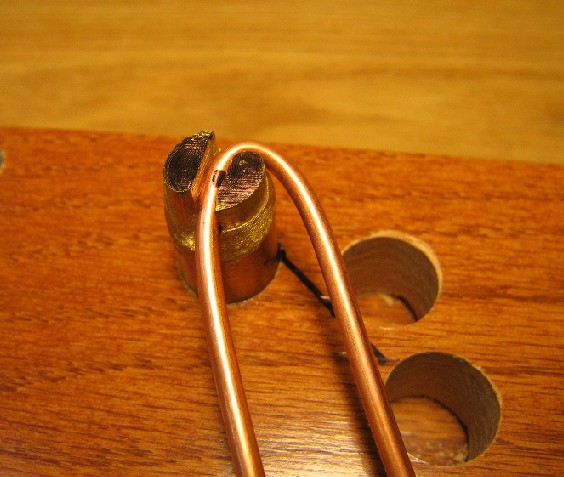
picture 6
Wrap the long section of the tube clockwise (it's the left leg in the above
photo) under the the short leg keeping
it tight together for two and three quarters
rotations so that it exits parallel to, and directly under the short end.
It may be helpful for kids to pass the tubing
through a short
section of drilled out wooden dowel to use as a
handle. This handle will
help keep the tubing from kinking as it is
being bent.
Place one of the plain dowel sections into the middle hole, the one nearest the bending
rod.
Bend both legs of the engine
around this dowel counterclockwise for about a quarter of a turn.
Photo #4
(above) illustrates this step.
Place the second dowel in the remaining hole and bend the legs clockwise till
they exit as shown
in photo #3
above. It is very helpful to use the
section of drilled wooden dowel to align the tubes and
keep them straight.
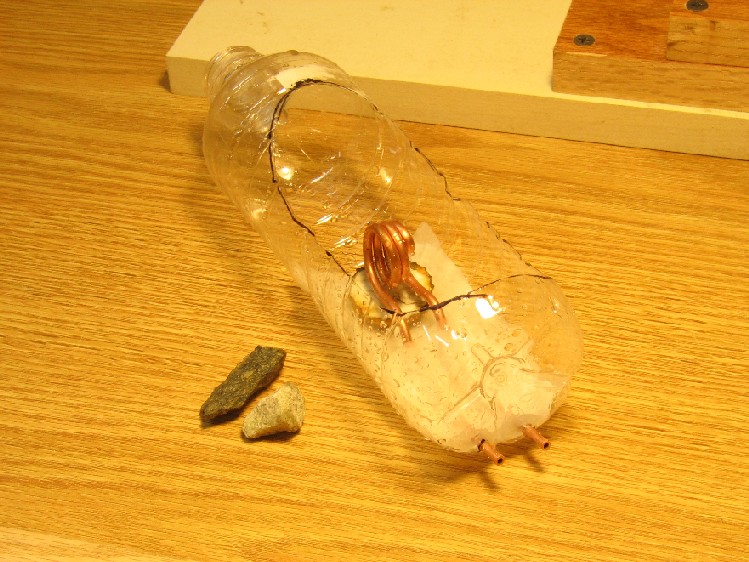
Remove the engine coil from the bending jig and..
Use the cutting jig to straighten the engine making both legs parallel and trim both ends to the same length.
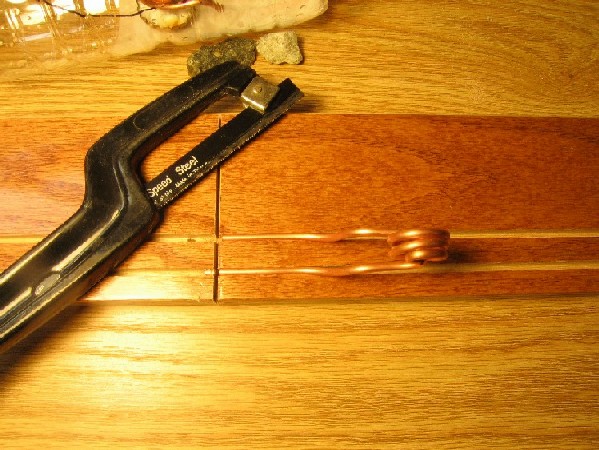
picture 7
Your engine is now finished.
Making the boat:
Use a cardboard template to mark the cutting line of your cockpit. Cut
the cockpit out with a sharp scissors.
Place the
finished engine on the floor of the boat and slide it rearwards as far as
possible. Center the two pipe
exits around
any folds in the plastic (note the vertical fold in the bottle bottom) and mark the hull where the
pipes will exit with
felt-tip marker. Use a
wooden-handled heated nail to melt the two exit holes in the hull.
You
may need a 1/8 inch bit to clean the holes.
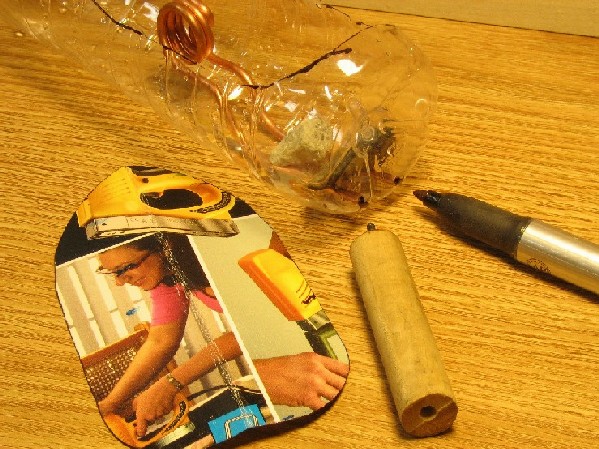
Place the engine in the hull and push the two jet legs through the hull.
Place the hull into the water.
If it leaks
a little it's ok, if it leaks a lot, a dab of plumber's putty inside will reduce the
leakage.
A double layer of paper toweling is
placed on the floor of the boat and under the jet pipes and a
second double
layer of wet paper toweling is placed over
the jet pipes.
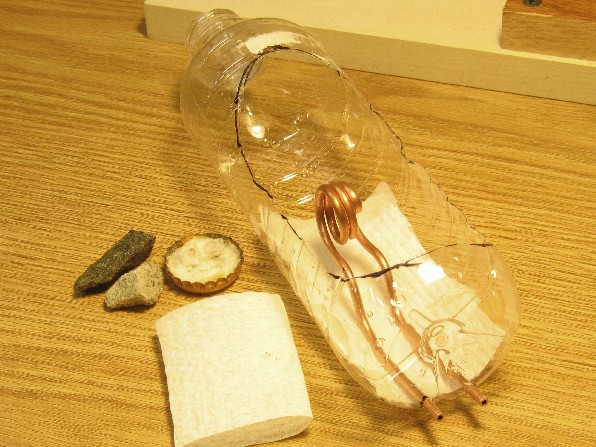
This
toweling is kept glossy-wet to absorb and dilute any spilled alcohol and help
cool the jet pipes.
The firepot is simply a steel bottle cap filled with squished Fiberfax or any
non-flammable
alcohol absorbent material.
To use your Putt-Putt boat:
Before you play, be sure there is a large open container of water handy in case
something gets out of
hand. Make sure there are no flammable materials nearby. All
alcohol dispensers must be small
(less than one half ounce). Ask your local pharmacy for a child's
medicine dispenser syringe,
they're usually free.
We play in a wading pool in a building, away from the wind.
Fill the firepot till glossy wet with 95% methyl or ethyl alcohol. The
fuel must be totally miscible with
water so test it before you fire it! I use fuel line antifreeze-dryer (95%
methanol) purchased from my
local auto parts store at 49 cents. It's good for about 50 runs.
Fill the copper engine with water by running one exit pipe under a fine stream
from the tap till it comes out
the other pipe or using a squirt bottle (drill a small hole in a soda bottle
cap and fill it totally with water.
Wet the paper toweling on the bottom of the boat with water. Put
the boat in the water and place
a couple of pebbles in the stern so that the exit tubes are sunk below the water.
Place the firepot under the coil
and ignite the firepot with a long butane grill igniter
or a long match.
Wait about
30 seconds and the boat will take off. It should develop top speed after
about a minute.
This boat is
designed to move in clockwise circles without a need for a rudder.
How it works:
The engine of our putt-putt boat is a coil made from a 14 inch length of 1/8” copper tubing. The tubing is filled with water and an alcohol flame is placed in the firepot (a steel bottle cap) under the coil. Once the coil gets hot, a rapid, oscillating steam-hot water cycle begins that alternately sucks water into the engine and quickly expels it when a bit of the water “flashes” to steam in hitting the hot portion of the coil.
The water is expelled from the engine in a very directional manner, jetting out of the pipes directly rearwards. Until recently, it was not clearly understood as to why the engine worked, since Newton’s “action-reaction” law would indicate that a given mass of water when sucked into the engine should make the boat react rearwards, and when the same mass of water is expelled from the boat at the same velocity it would make the boat react by moving forwards. If you assume the entering and exiting velocities are equal, according to Newton, the boat should simply move back and forth the same distance each cycle and not ever advance. It is now understood that when water is sucked into the engine it’s entry is quite non-directional, coming turbulently from all around the intake opening. When it is expelled down the bore it is highly directional rearward. This difference in directional vs. turbulent flow between intake and expulsion, alone, is enough to propel the boat.
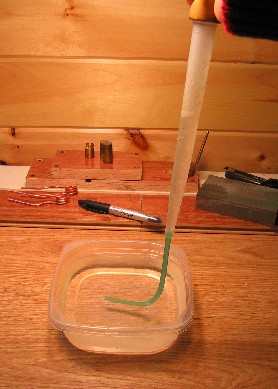
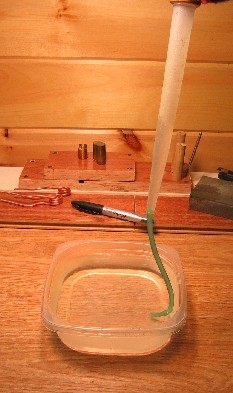
The movies show the principle. A plastic turkey baster is fitted with a curved piece of very soft silicone plastic aquarium tubing. The tip of the tubing is placed under water as shown below. The bulb is squeezed, expelling air from the baster. The hand then relaxes on the bulb allowing the baster to quickly draw in water as much as possible. As the water is drawn into the baster the tip of the aquarium tube will not move rearward very significantly.
As the water is expelled the tip of the silicon tubing moves rightward
Click here to download and watch the movie.
Click here to download a Pop-Pop Center parts and materials checklist. This is very helpful if you travel with the exhibit.
Lots of other Putt-Putt (or Pop-Pop) resources:
The Pop-Pop pages, excellent resources and web links
Experiments with coil engines from the Netherlands
A transparent pop-pop engine pdf file
A paper pop-pop boat from the Science Toymaker
Pop-pop boat in an anchovy can
Instructions for a folded aluminum pop-pop engine from the Science Toymaker
commercially made boats for sale
HAVE FUN TINKERING!